Budget Friendly Projects to Learn Robotics: Ideas and Resources
You can build real robots for $25 to $100 in a single weekend. No expensive kits, no specialized tools—just components you can order online and assemble in 2 to 8 hours depending on the project.
This guide organizes robotics projects by exact budget ($25, $50, $100 tiers), with build times and skills learned for each. You’ll know exactly what to buy, where to buy it cheapest, and what you’ll gain from each project.
Budget Tiers at a Glance
Before diving into specifics, here’s how budgets map to what you can realistically build:
| Budget | What You Can Build | Timeline | Experience Level |
|---|---|---|---|
| Under $25 | Bristlebot, Cardboard Robot, LED Flasher | 15min - 2 hours | No electronics experience |
| $25-50 | Line Follower, Obstacle Avoider, Robotic Arm | 2-6 hours | Basic programming helpful |
| $50-100 | WiFi Robot, Bluetooth Car, Maze Solver | 4-10 hours | Some programming experience |
If you’re starting from zero, the $25 tier gets you moving within hours. If you have some Arduino experience, jump to $50 for projects that teach core robotics concepts like sensor integration and motor control.
Choosing Your Platform
Your choice of microcontroller affects both budget and capabilities.
Arduino Uno ($10-15) has the most beginner tutorials available and is the safest starting point if you’re new to programming. Nearly every robotics concept has an Arduino example online.
ESP32 ($6-12) costs less than Arduino and includes built-in WiFi and Bluetooth, making it ideal if you want wireless control or IoT features. According to Random Nerd Tutorials, the ESP32 can cost as little as $6 while offering dual-core processing and extensive I/O options.
Raspberry Pi Zero ($5-15) is the choice for Python projects, camera integration, or when you need more computing power than a microcontroller provides.
Recommendation: Start with Arduino if you’re learning programming fundamentals. Choose ESP32 if you want wireless features and don’t mind slightly fewer beginner resources.
Projects Under $25
These three projects require minimal investment and teach foundational concepts in under 2 hours combined.
Bristlebot ($2-5, 15-30 minutes)
The fastest path to a moving robot. You need a toothbrush head, a vibrating motor (salvaged from an old phone or pager), a coin cell battery, and tape.
Attach the motor and battery to the toothbrush head with tape. When powered, the vibration makes the bristles move the robot forward. No programming, no soldering—just basic circuit concepts and mechanical thinking.
Skills learned: Basic circuits, motor concepts, mechanical assembly
Why start here: Instant gratification builds confidence. You’ll have a moving robot in 15 minutes.
Simple Cardboard Robot ($10-15, 1-2 hours)
This project introduces motors and switches without any programming. Components: a DC motor ($1-2), battery pack, switch, cardboard, and bottle caps for wheels.
Build a simple chassis from cardboard, mount the motor and wheels, wire the switch and battery pack in series. Flip the switch and it moves.
Skills learned: Basic circuits, mechanical assembly, motor fundamentals
Why build it: You’ll understand how electrical signals translate to physical motion—the core concept behind all robotics.
LED Flashing Robot ($5-10, 30-60 minutes)
Your first programming project. Components: Arduino Nano clone ($3-5), LEDs, resistors, and a battery.
Connect LEDs to digital pins through current-limiting resistors. Write a simple sketch using digitalWrite() to blink the LEDs in patterns. Upload via USB and watch your code control hardware.
Skills learned: Arduino IDE basics, C++ syntax, digital output, upload process
Why it matters: This is the bridge between software and hardware. Every sensor and motor you’ll use later builds on this foundation.
Projects $25-50
These four projects teach core robotics concepts: sensor integration, motor control, and autonomous decision-making.
Line Following Robot ($25-40, 2-4 hours)
The classic first “real” robot. Components: Arduino Uno ($10-15), two IR sensors (under $4 total), L298N motor driver ($5-10), two DC motors ($2-4), chassis ($5-10), and batteries.
IR sensors detect the contrast between a dark line and light surface. The Arduino reads these sensors and adjusts motor speeds to keep the robot on track. According to Circuit Digest, beginners with basic Arduino knowledge can complete this in 2-4 hours.
Note: Some component kits come without soldered headers, so you may need a soldering iron or solderless breadboard jumper wires. The L298N driver is beginner-friendly with abundant tutorials, though alternatives like the TB6612FNG or L9110S offer better efficiency at similar prices if you’re comfortable with fewer guides.
Skills learned: Sensor integration, motor control, conditional logic, PID basics (optional)
Career relevance: Sensor fusion, control systems fundamentals
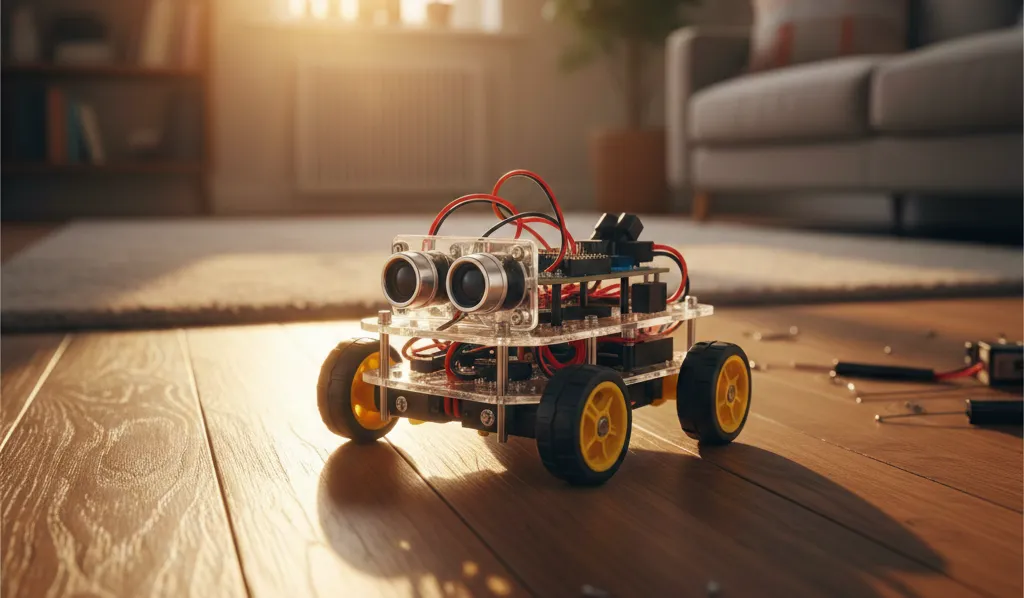
Obstacle Avoiding Robot ($30-45, 3-4 hours)
Similar to the line follower but uses an ultrasonic distance sensor instead of IR. The HC-SR04 ultrasonic sensor costs under $2 according to Random Nerd Tutorials’ guide to Arduino modules.
The robot measures distance to objects ahead and turns when it detects an obstacle within a threshold distance. More sophisticated versions can map surroundings or choose optimal paths.
Skills learned: Ultrasonic sensing, distance measurement, decision logic
Career relevance: Perception basics, autonomous navigation fundamentals
Light Following Robot ($25-35, 2-3 hours)
The simplest sensor-based project in this tier. Uses two light-dependent resistors (LDRs) costing under $2 to detect light direction. The robot turns toward the brighter side.
Skills learned: Analog sensor reading, phototropism programming, comparing sensor values
Why build it: Perfect for understanding the difference between analog and digital sensors before tackling more complex projects.
Simple Robotic Arm ($35-50, 4-6 hours)
Uses four SG90 servo motors (approximately $0.50-$3 each from AliExpress) to create a multi-joint arm. Mount them on craft sticks or a 3D-printed frame.
Servos require precise timing signals. You’ll learn to control position through pulse-width modulation and coordinate multiple joints for smooth movement.
Skills learned: Servo control, basic kinematics, precision movement
Career relevance: Robot arm programming, manipulation tasks
Projects $50-100
These projects introduce wireless communication, complex algorithms, and skills directly applicable to professional robotics work.
WiFi-Controlled Robot ($60-80, 4-6 hours)
Uses an ESP32 ($6-12) instead of Arduino to get built-in WiFi. You’ll write a simple web server that responds to HTTP requests from your phone or computer.
Open a browser, click directional buttons, and the robot moves. The code teaches web server basics, HTTP handling, and how to bridge network protocols to physical hardware.
Skills learned: Web servers, HTTP, WiFi programming, IoT concepts
Career relevance: IoT development, web interfaces for hardware
Bluetooth Robot Car ($50-70, 3-5 hours)
Uses an Arduino with an HC-05 Bluetooth module ($5-8). Control the robot from a smartphone app you’ll configure or build.
Bluetooth introduces serial communication protocols and the challenges of wireless latency. You’ll handle connection states, command parsing, and timeout logic.
Skills learned: Serial communication, Bluetooth protocols, mobile integration
Career relevance: Mobile-controlled systems, wireless protocols
Maze Solving Robot ($50-70, 6-10 hours)
The most time-intensive project in this tier. Uses IR or ultrasonic sensors to navigate and “learn” a maze, then solve it optimally on subsequent runs.
This requires implementing pathfinding algorithms—typically a simplified version of the left-hand rule or more sophisticated state machines. Some builders implement flood-fill algorithms for optimal path finding.
Skills learned: Pathfinding algorithms, state machines, decision trees
Career relevance: Autonomous navigation, algorithmic thinking
Portfolio value: A well-documented maze solver with algorithm explanation stands out in robotics applications.
Where to Buy Components Cheapest
Component prices vary dramatically by source. Here’s the practical breakdown:
| Component | Cheapest Source | Price Range | Notes |
|---|---|---|---|
| SG90 Servos | AliExpress | $0.53-$0.59 | 2-4 week shipping |
| Arduino Clones | AliExpress/eBay | $3-5 | vs $25 genuine |
| Sensors/Modules | eBay | Under $2 each | Fastest shipping option |
| L298N Driver | eBay/Amazon | $5-8 | Common availability |
| Chassis/Kits | Amazon | $10-20 | Prime shipping |
AliExpress offers the lowest prices—SG90 servos for $0.53-$0.59 and Arduino clones for $3-5—but expect 2-4 week shipping. Plan ahead and order core components in batches.
eBay is the sweet spot for sensors and modules under $2 each with faster shipping than AliExpress. According to Random Nerd Tutorials, eBay consistently offers the best selection of affordable Arduino modules.
Amazon costs 20-50% more but delivers in 1-2 days. Use it for quick replacements or when you need a part immediately.
Practical strategy: Order core components (microcontrollers, motors, drivers) from AliExpress when you can wait. Grab sensors from eBay. Reserve Amazon for last-minute needs or complete starter kits.
Building Career Skills
Each project teaches skills that translate to specific career paths:
For robotics engineer roles: Line Follower, Obstacle Avoider, and Maze Solver demonstrate sensor integration and control systems—core competencies for autonomous systems work.
For embedded systems roles: Any Arduino or ESP32 project shows proficiency with C/C++, hardware interfaces, and common protocols (I2C, SPI, UART).
For software engineering roles: WiFi Robot and computer vision projects demonstrate Python, web development, and API design skills.
Resume presentation tips (see our robotics engineer interview questions guide for more):
- Document every project on GitHub with clear README files
- Include cost breakdowns—employers appreciate practical budgeting skills
- Write about challenges faced and how you solved them
- Add video demos when possible; working hardware impresses more than code alone
Searching recommended jobs...
Recommended Learning Path
Follow this sequence over 8 weeks:
Week 1: Bristlebot (15 minutes) → Cardboard Robot (2 hours). Total investment: $15, 2.5 hours. You’ll understand motors and basic circuits.
Weeks 2-3: Line Following Robot (4 hours). Investment: $35, 4 hours. First sensor integration and real programming.
Weeks 4-5: Obstacle Avoiding Robot (4 hours). Investment: $40, 4 hours. Learn ultrasonic sensing and decision logic.
Weeks 6-8: Robotic Arm OR WiFi Robot (6 hours each). Investment: $50-70, 6 hours. Choose based on whether you’re more interested in manipulation or IoT.
Total path: $100-150 and approximately 25 hours over 2-3 months. You’ll progress from zero experience to building autonomous, programmable robots.
Common Questions About Budget Robotics Projects
What is the cheapest robot I can build?
Can I learn robotics at home without expensive equipment?
What should my first robotics project be?
How long does it take to build a robot from scratch?
Do I need to know programming to start robotics?
Getting Started
Pick your budget tier and order components today. The under-$25 projects require minimal investment—you can have a moving robot this afternoon.
Your first goal: get something moving within 2 hours. Whether it’s a Bristlebot or a programmed motor, the experience of making hardware respond to your instructions changes how you think about robotics.
From there, each project builds naturally on previous skills. The line follower teaches sensors. The obstacle avoider adds decision-making. The maze solver introduces algorithms. By the time you reach $100 in investment, you’ll have hands-on experience with the same concepts used in professional robotics development.
Share this guide on
Article by

Robotics Platform Engineer at Menlo Research (menlo.ai) and founder of CareersInRobotics.com, where he analyzes thousands of robotics job postings to identify salary trends, skill demands, and hiring patterns.